
Easy DIY Bow Front Cardigan with Ribbon

This post may contain affiliate links.
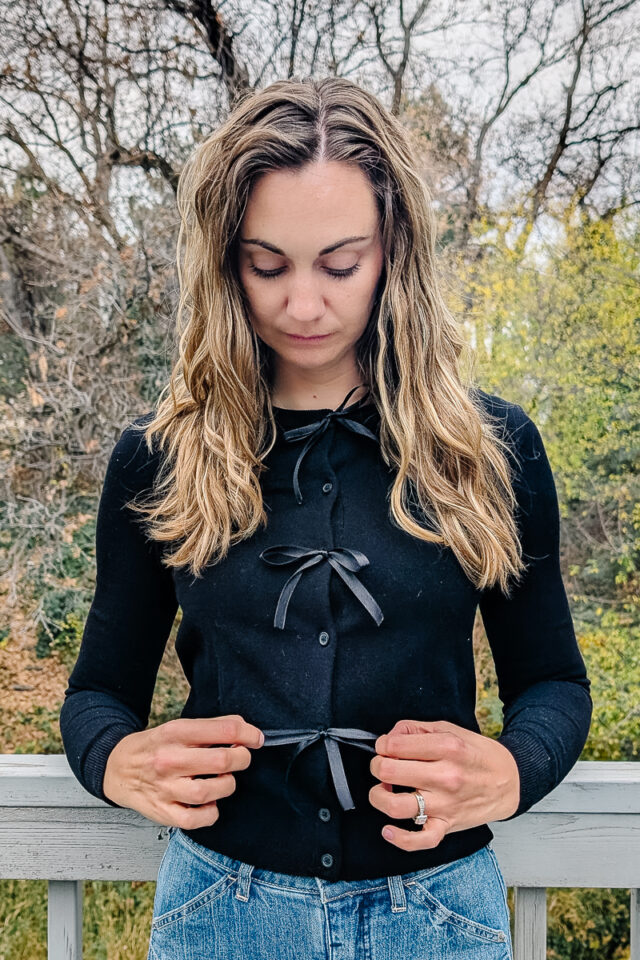
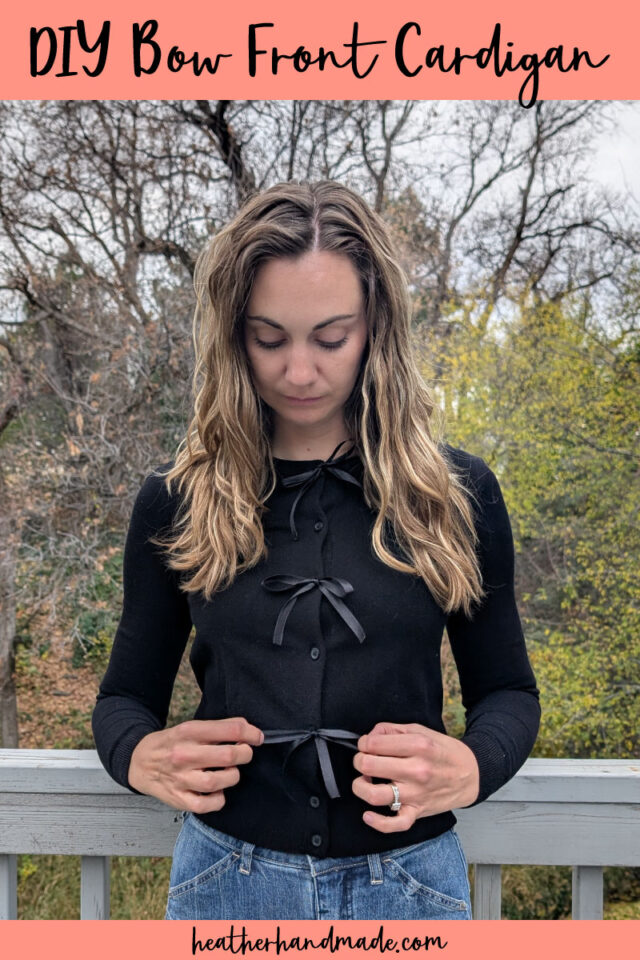
Learn how to dress up a cardigan by replacing the buttons with ribbon. This easy DIY bow front cardigan is great for holiday parties.
I have seen so many bow front cardigans online and in person, and they are just so cute. I love how it dresses up a classic solid cardigan, or you can make a cardigan unique and fun with the choice of a colorful printed ribbon. I kept thinking that making my own would be one of the easiest refashions I could do!
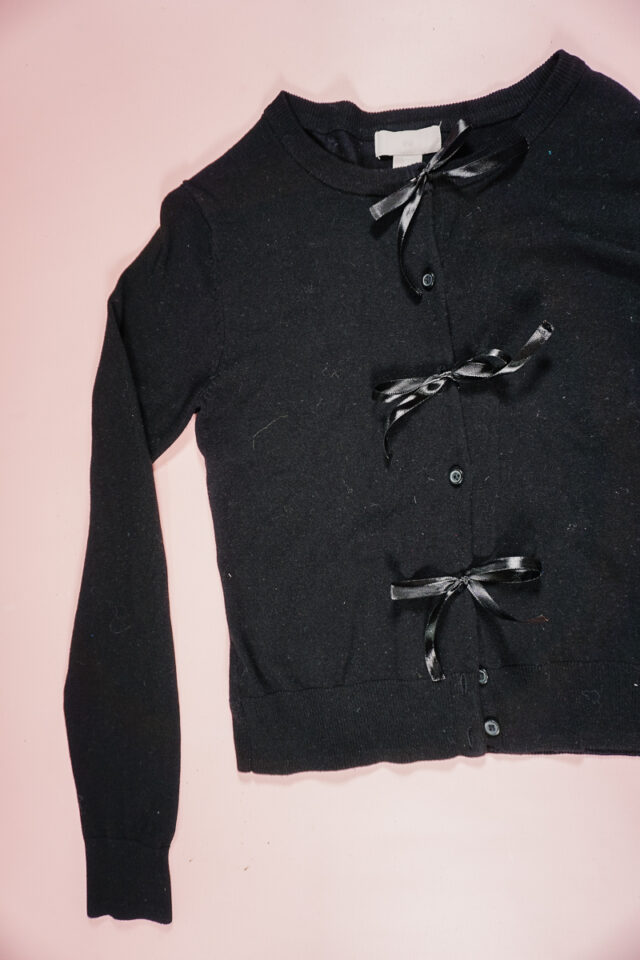
I finally found a great base cardigan and I had some black matching ribbon in my stash. This is only a little bit of cutting and sewing. You could even do it all by hand! Let me teach you how to make a DIY bow front cardigan.
What kind of cardigan works?
Almost any kind of cardigan will work depending on the look you are going for. I didn’t want a v-neck cardigan, and I wanted a more fitted style.
I think the more fitted the cardigan then the smaller the ribbon, and the looser tbe cardigan then you can go with a bigger ribbon. But you can do whatever you want!
What kind of ribbon works?
You don’t want anything too wide, and you want to make sure the ribbon can tie into a nice bow. Satin ribbon in different widths is the best kind of ribbon that looks nice and ties well.
What is refashioning?
Refashioning is to fashion clothing again or differently. I usually use this to describe when I’m sewing clothing to fit different or to look different, but the majority of the item stays the same.

Love to sew? Try one of these fun sewing projects:
- Sweater refashion ideas
- Sweater to cardigan refashion (and add ribbons!)

DIY Bow Front Cardigan
Supplies
- A cardigan of your choice
- Satin ribbon in the color and width of your choice
- Sewing tools
- Sewing machine

Instructions
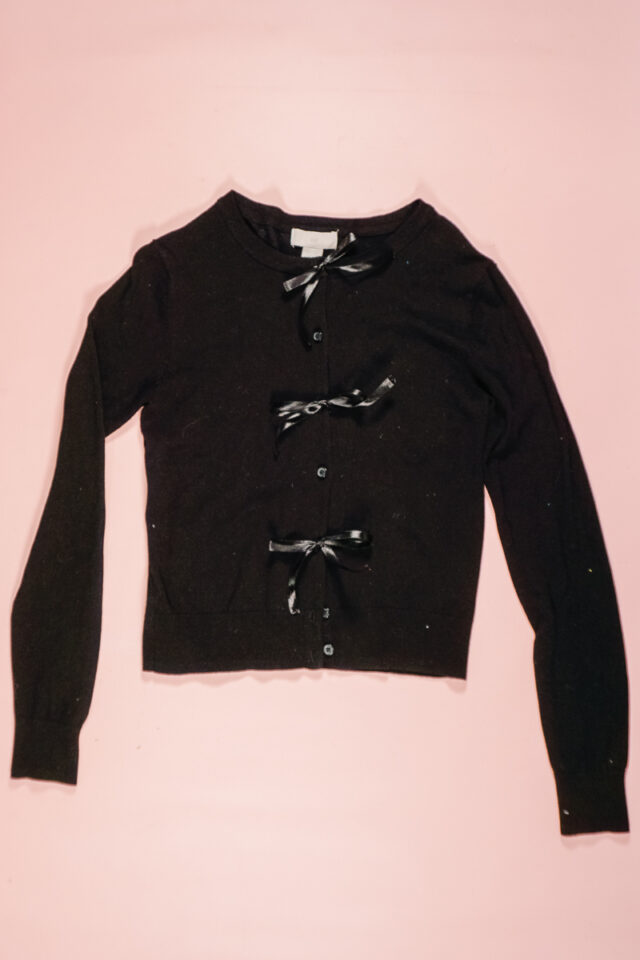
Count how many buttons are on the cardigan. Decide if you want to remove all of them or just some of them. There were six buttons on my cardigan, but I didn’t want six bows. I removed three buttons so the resulting cardigan can alternate between a button and a bow.

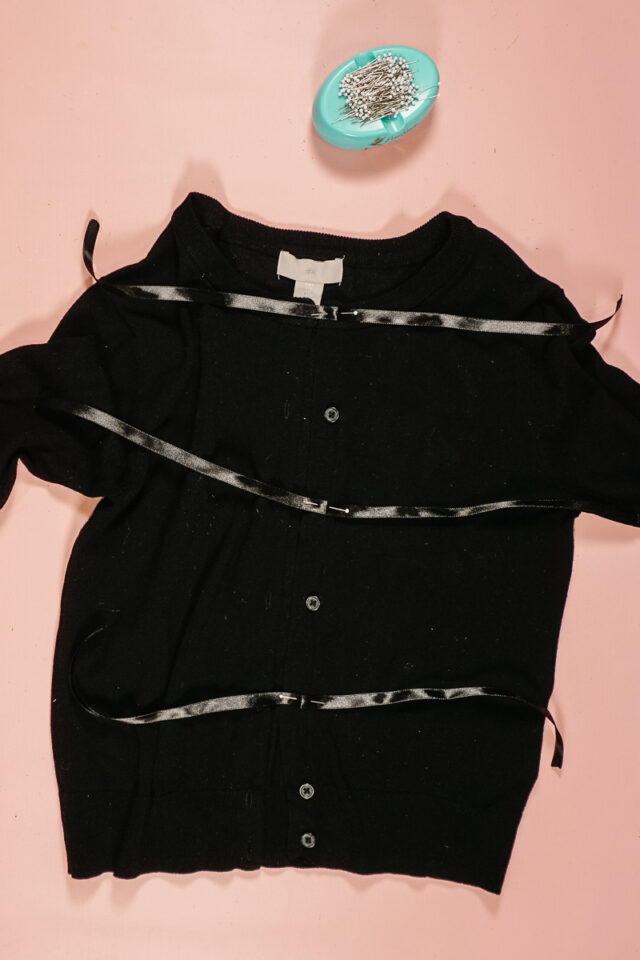
Cut your ribbon pieces about 18 inches long. This is a longer length, but you want some room to play with. If you have a wide ribbon you can try hemming the ends. Any ribbon can be burned at the ends with a lighter to quickly finish the raw edges.

Find the center of each ribbon piece. Pin the center of the ribbon onto the cardigan where each button was removed.
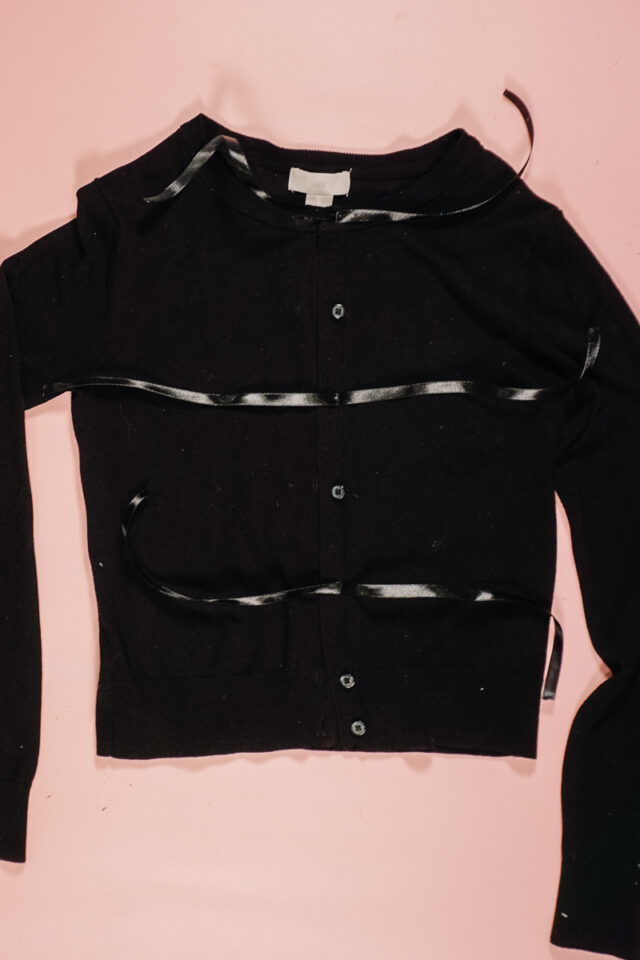
Sew through the center of each ribbon. Make sure to backstitch when you start and stop to lock the stitches.
When tying the bow, pull one end of the ribbon through the button hole to close the cardigan front. Then tie the two sides of the ribbon into a bow. If you are worried about it coming undone, you can tie it in a double knot.
You finished!
If you make something using this sewing project, I’d love to see! Please share it on social media with the hashtag #heatherhandmade and tag me!

I believe small sewing moments can create great joy. Find your own “right” way to sew. -Heather